Pages

Showing posts with label baby. Show all posts

Tuesday, 5 February 2013

Little booties and some news about my patterns

You know, I'm really happy today. Despite the fact that the winter is back and a nice sunny day suddenly turned into a snow storm I'm sitting here and smiling. And I've got several reasons for that.
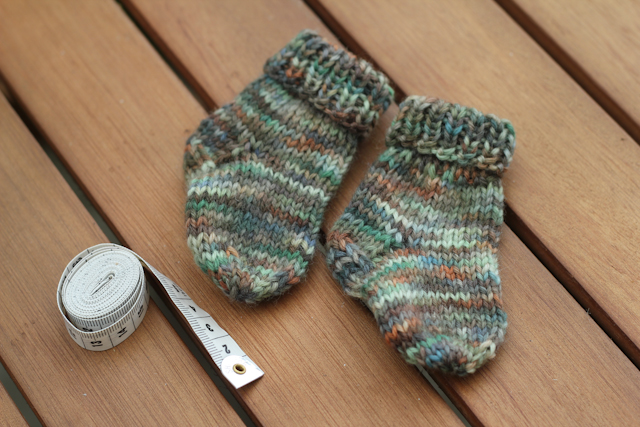
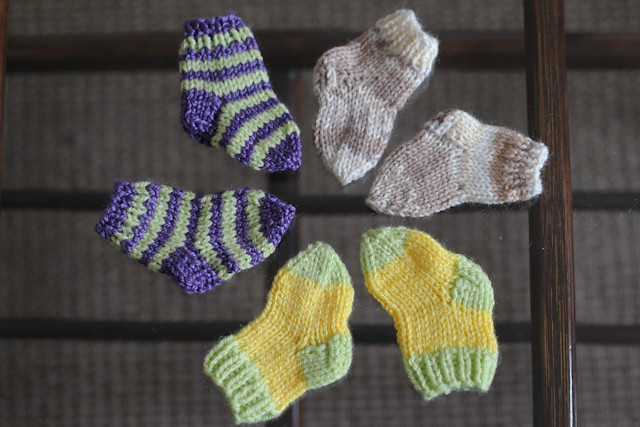
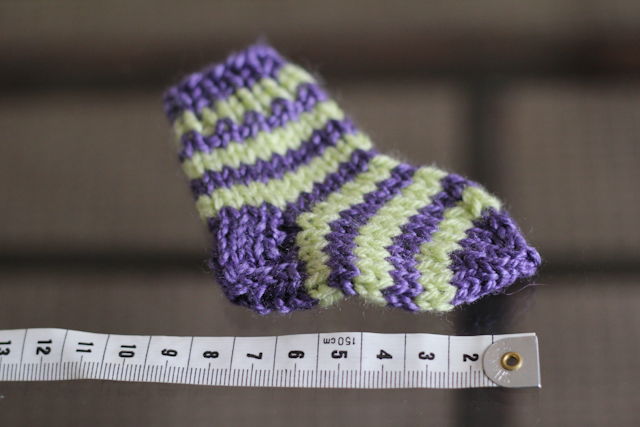
First of all, yesterday for the first time in my life I've posted a pattern to Ravelry. My tiny newborn socks. And today I've discovered that 47 complete strangers added it as a favourite and one lady already knitted a pair! Wow!
Then yesterday in the evening while Little Man was having a nap I translated the same pattern into Russian for the lovely ladies in Russia who knit and crochet charity blankets and clothes for children in Russian orphanages. Send it to one of them and she posted it into her blog so ladies could use the pattern for their charity projects. And again - almost 40 complete strangers re-posted it to their blogs.
Someone would say that 40 is not much and even 80 (if I would count all of them together) is not much too, but for me it means a lot. Really a lot. And first of all it is so important to me because I don't know this people and they don't know me, so they liked my pattern not because they like me and want to be nice and polite, but because they all like what I did. And it makes me feel happy and proud of myself.
The other thing that made me smile was a response from the lady from Canada who received my pot holder, that I crocheted for her participating in a Pot Holder Swap on swap-bot.com She loves it and it was nice to read how talented I am and how perfect the work and the colours are.

Today I finally packed everything for my charity package to Russia. Hoped to send it today, but had to stay at home because of the snow. Anyway, I promised to show you the booties I was making for orphanage babies. Here they are:
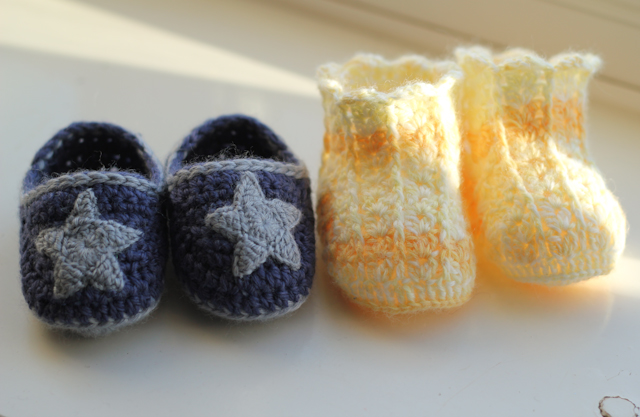
baby booties

The yellow ones were made using a pattern found here which actually is not a pattern but a Japanese crochet chart (the chart itself can be found here ). It might look a bit confusing but after you figure out what they mean in the chart the booties turn out to be quite easy. I used 3mm crochet hook and some DK yarn and the finished size is about 3-6 months.
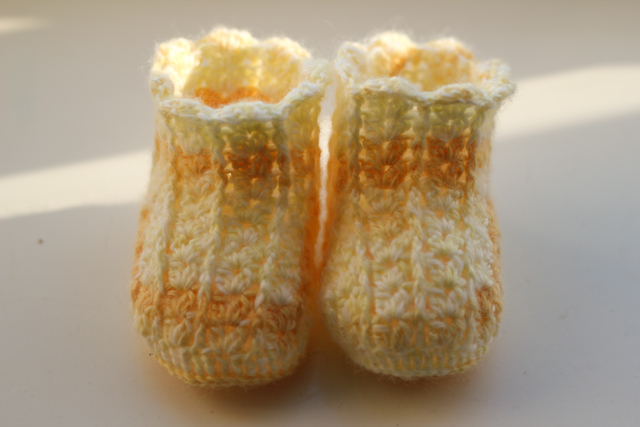
yellow baby booties

The blue ones are actually my favourite. For them I used a pattern I found on Pinterest but I had to modify it a bit as I just could not understand the pattern in the end. Little crocheted star pattern can be found here and I used 2mm crochet hook and a bit of 4ply for them.  For the booties I used 3.5 mm crochet hook, not 4.25 as in the pattern as I just didn't have one, and DK yarn leftovers. The size I was making was 6-9 months, but I ended up with a really tiny pair, 0-3 or even newborn size... Was it my crochet hook that changed the size so much?
But I still love them
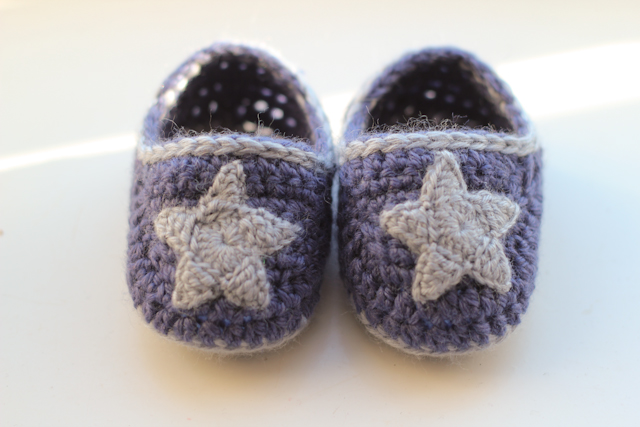
blue star baby booties

Hope are doing great too :)
Have a nice evening!

Wednesday, 30 January 2013

Hat mood, charity and some Scrap buster hats for babies

Since my last post I had a great crocheting period. I've been in a hat mood. First of all because I noticed that my Little Man's hat, a gift from his grand grand parents, was sliding over his eyes all the time he was outside, so it was obvious that he needed a new hat, the one that would fit. I've searched my stash, found some yarn and grabbed a crochet hook. In the first evening I had to remake it, starting all over again for about 5 times, but after all of that and one more evening the hat was finally finished.

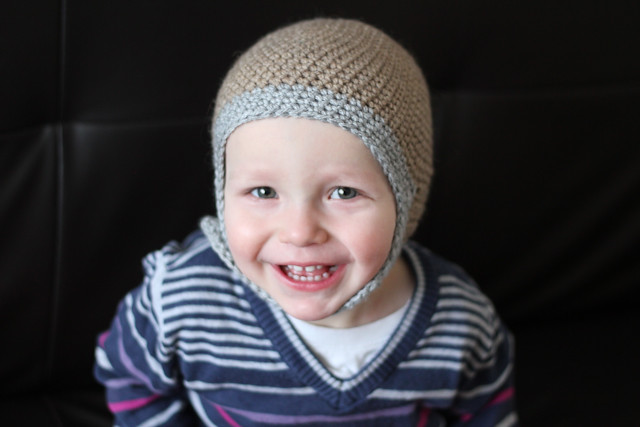
Little Man likes his new hat

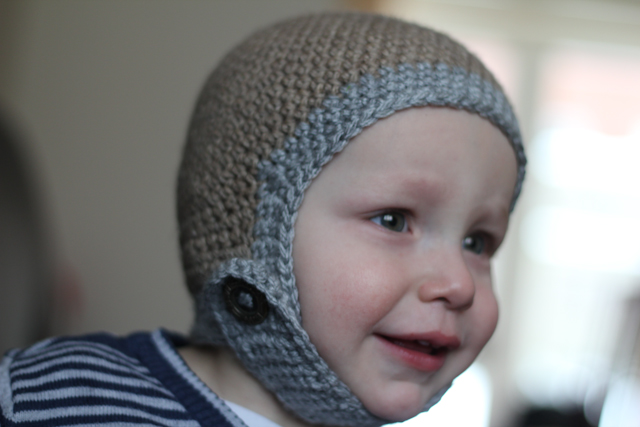
As you can see Little Man likes it. It has a big metal button on a side and fits perfectly. Every mum knows that babies are not big fans of hats and if they can pull that hat off, they will. Well, no chance with this one, Little Man was trying really hard but had to give up without even moving it away.

Little Man's new hat

Sadly I wasn't writing down the pattern while working on it. May be I will try to recreate it later as it might be useful for some other babies too.

After finishing that hat I realized that my husband needs a hat too (it was snowing and freezing outside), so from the same yarn in the same evening I made a hat for him. That one was so easy, that I will make a pattern for it and crochet one for myself. Sadly, no pictures of it this time.

Then last Sunday I bought a knitting magazine and found an article about knitting for premature babies there. It was good to know that there are ladies here in England who knit tiny little clothes for premies and give them to the hospitals. While reading this article I felt that a big need for some charity work was growing in me. I wanted to help someone too. But I wasn't sure, that our hospital would take my knitting as I don't think they are dealing with premature babies. So I was thinking about orphanages. Went to the Internet and soon discovered that there are no orphanages in England. Makes me proud of this country again.
And then I remembered that in 2011, when I was pregnant with Little Man I took part in a charity project for orphanages in Russia. I crocheted a blanket for them. Why not to make something like that again? I found one of the project coordinators in the Internet and started crocheting.
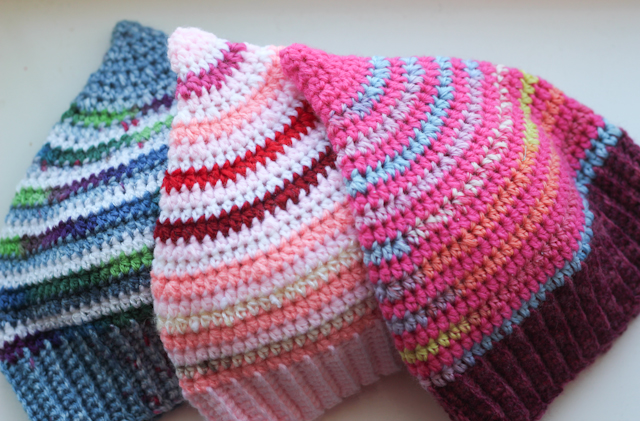
Here are three little Scrap buster hats I made for babies:

Scrap booster hats for babies

The pattern is A Scrap Buster hat from A Dog in a Sweater. When I saw this pattern for the first time I immediatelly wanted to make a hat like that but wasn't sure that I would wear it. It felt like something too childish, so perfect for babies, not for grown-ups. So when I decided to crochet for an orphanage it was a perfect chance to try the pattern out.
What should I say about the pattern... It's easy. In fact it's super easy and written so good that it's easy to follow even for beginners. The only thing you really should think about before making them, except the size, of course, is the colour. The original hats looked a bit strange to me. No, they were fine, they just looked scrapy. And I wanted to make my hats funny, colourfull, but stylish in the same time. This are still scraps, but it doesn't feel like something that's made from unwanted leftovers.
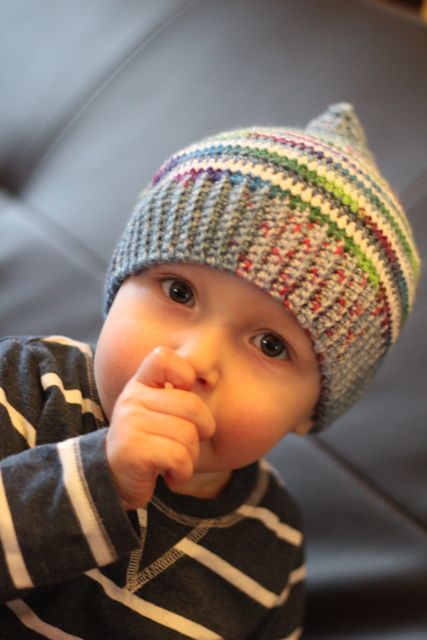
I've changed the design a bit too as I didn't want to make the long braid like on the original hat, and I wanted mine hats to have a bit of gnome style. So I made following changes: after row 18 I repeated rows 17 and 18 two more times and then crocheted every two together in the next row. As one of the hats was Little Man's size I asked him to be a model and you can see how it looks on babu head:

Scrap booster hat and my little man as a model

Now I'm working on two pairs of baby booties from my scraps too for the same orphanage. Will show them to you when they are ready.

Hope you all have a nice day :)

Friday, 9 November 2012

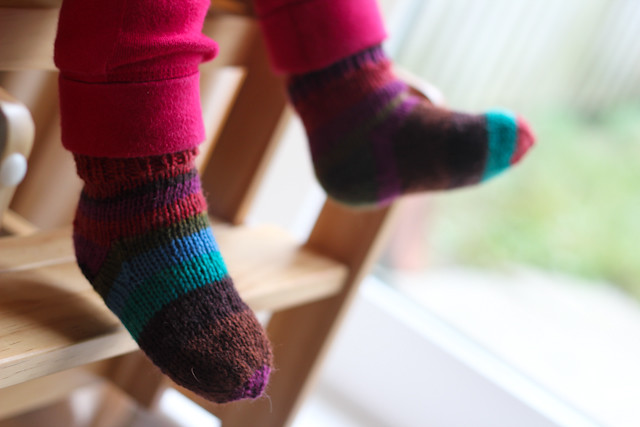
Baby socks free pattern. 12 - 18 months

It is getting colder and I'm knitting lots of stuff to make my Little Man ready for the winter. And some warm socks are a must-have thing, so I made a couple of pairs and can share the pattern with all of you.

Baby socks, 12-18 months

So you will need a bit of sock yarn (4ply) and 2.5mm double pointed needles. What is sock yarn? It's quite thin, about 200m in 50g, and usually it has 75% wool (or more) and some nylon in it to make the socks stretchy and washable in the washing mashine (on mild wash still). You can use other yarns, of course, in fact if you use a thin DK yarn with the same size needles it will still give you the same size. Just check the gauge before you start :)

Gauge: 4 rows X 2.5 st = 1 X 1 cm

Abbreviations used:
st - stich
k - knit
p - purl
k2tog - knit 2 together
p2tog - purl 2 together
ssk - slip slip knit (here is the on video how to do that)

Cast on 32 stiches and divide them between 4 needles. You have to cast on really loosely, so I would adwise to cas on on two needles (just put them together and acst on as if they were one, then remove one of the needles and divide the stitches between four needles). There will be 8 st on each needle then. We'll work in rounds starting with the 1x1 rib.
Round 1: *k1, p1*, repeat from * to * till the end of the round.
Rounds 2 - 9: repeat round 1
Round 10: knit
Round 11 - 23: repeat row 10
then work only on first and second needle, which means - with 16 st. Take them to one needle and work in rows.
Row 24: knit 16, turn
Row 25: purl 16, turn
Row 26 - 33: repeat row 24-25.
Row 34: knit 11, ssk, turn
Row 35: take the first st off to the holding needle to the working needle (don't purl it!), purl 7, p2tog, turn
Row 36: take the first st off to the holding needle to the working needle (don't knit it!), knit 7, ssk, turn
Row 37: take the first st off to the holding needle to the working needle (don't purl it!), purl 7, p2tog, turn
Row 38: take the first st off to the holding needle to the working needle (don't knit it!), knit 7, ssk, turn
Row 39: take the first st off to the holding needle to the working needle (don't purl it!), purl 7, p2tog, turn
Row 40: take the first st off to the holding needle to the working needle (don't knit it!), knit 7, ssk, turn
Row 41: take the first st off to the holding needle to the working needle (don't purl it!), purl 7, p2tog, turn

And you'we done the heel!
Now you have 8 st on the heel. Take the first st off the holding needle to the working needle and knit that  7 remaining st from the top of the heel, then cast on 10st along the left side of the heel, knit the stiches from 3rd and 4th needle, cast on 10 st along the right side of the feel and knit 4 st from the top of the heel. Now you should have 14 st on the 1st needle (10 from the side of the heel and 4 from top of the heel), 14 st on the second (the same as on the first one), 8 st on the 3rd, 8 st on the 4th.

Now we'll start making the decreases as we need to have 8st on each needle and we have much more than that on the 1st and the 2nd needle. Remember that we just finished knitting the stitches from the first needle. Now we'll work in rounds again making the decreases in the beginning ot the 1st and in the end of the 2nd needle as follows:
Round 42: knit 12 st from the second needle, k2tog, knit st from the 3rd and the 4th needle
Round 43: ssk, knit 12 (first needle), knit 11, k2tog (second needle), knit 8 (3rd needle), knit 8 (4th needle).
Round 44: ssk, knit 11 (first needle), knit 10, k2tog (second needle), knit 8 (3rd needle), knit 8 (4th needle).
Round 45: ssk, knit 10 (first needle), knit 9, k2tog (second needle), knit 8 (3rd needle), knit 8 (4th needle).
Round 46: ssk, knit 9 (first needle), knit 8, k2tog (second needle), knit 8 (3rd needle), knit 8 (4th needle).
Round 47: ssk, knit 8 (first needle), knit 7, k2tog (second needle), knit 8 (3rd needle), knit 8 (4th needle).
Round 48: ssk, knit 7 (first needle), knit 8 (second needle), knit 8 (3rd needle), knit 8 (4th needle).
Now you should have 8 st on each needle.

Knit 24 more rounds with no decreases.

NB! This quantity of rows is calculated from the average lenght of baby foot at this age, which is 12.5 cm. But please note that all babies are different and some of them can have much smaller or bigger feet at the same age. For example, Little Man is only 11 months old, but his feet (well, the whole baby in fact) are quite big, exactly 12.5 cm. So, before you start knitting I would advise you to measure your baby's feet and adjust this part to your baby's actuall size by knitting more or less than 24 rows.

Then you need to start decreasing to form the toe:
Round 1: K2tog in the beginning and end of each needle (6st on each needle)
Round 2: knit
Round 3 - 4: repeat rounds 1-2 of the toe (4st on each needle)
Round 5: knit every two st together (2st on each needle)
Round 6: knit every two st together (1 st on each needle).
You will have 4 st left. Cut the yarn leaving 10cm long tail. Using the tapestry needle sew the last st together and hide the yarn ends.
Repeat for the second sock!

If you knit some socks using my pattern, please leave a link to the picture of your creation in comments. I'd love to see it :) And please let me know if you find any mistakes in the pattern too.

Thursday, 1 November 2012

Baby Phoebe blanket and some news about my Little Man

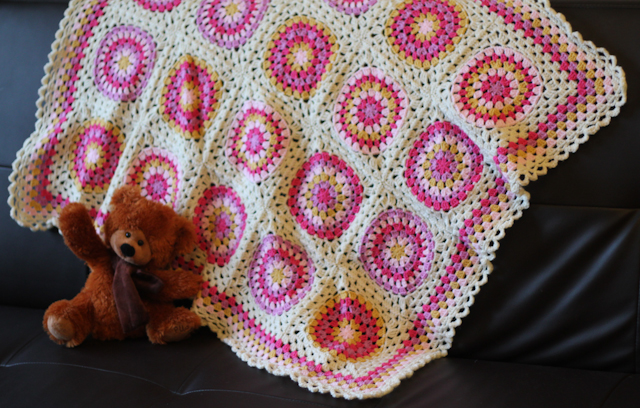
Well, here I am again this Thursday morning to show you a baby blanket I made for a lovely baby Phoebe on her first birthday. Little Man was invited to her party but was ill that day (had a real Niagara waterfall from his nose) so we cold not go. And then it took me more than a month to actually meet Phoebe's mum Jenny and give her the blanket. And as I didn't want to show it before the little owner gets it I'm showing it only now despite it was finished in September.

IMG_3192

Sorry for the picture quality, had to take them in the evening right before I gave the blanket away. I really wanted to make a picture of it outside, but the weather just didn't let me do it.
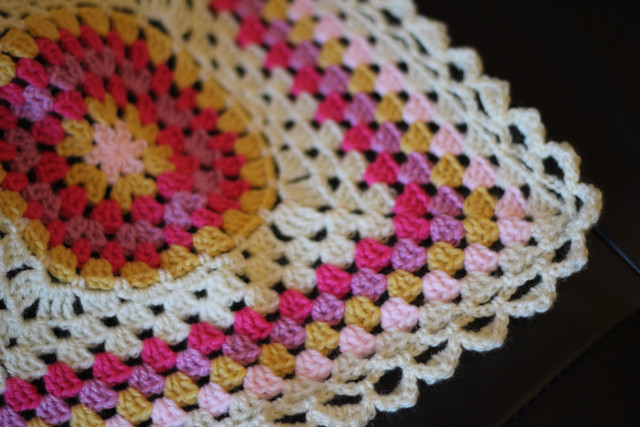
Here is a little close-up to show you the edging. I was using the tutorial from Attic24 for the edging and must say that it's a good way to finish a blanket. Looks nice and feminine, but not too feminine if you know what I mean.

IMG_3194

For the squares I used a Squaring Big Circle tutorial from Signed With An Owl and I'm totally in love with this granny square. It's bright, it's fun and it looks really good. So no wonder I really like the result.
When I was crocheting this Little Man was trying to steal the blanket from me and ewerything I said about it beeing pink and girlish, so not for him, just didn't help. So I guess he liked it too.

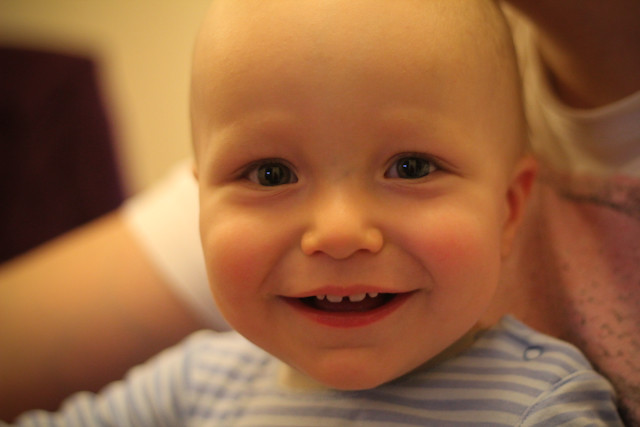
By the way, if you are interested in Little Man, he is just fine and started walking two days ago. It doesn't mean that now he is walking all the time, as he is choosing between walking and crawling and since crawling is easier and faster he still prefers to crawl mos of the time. But when he is walking through the room hugging a teddy bear it just looks sooooo sweet! The only problem with taking a photo of it is that the moment Little Man sees a camera he goes back to crawling. Is he shy? Not shure about it yet but will try again and see if I can manage to make some pictures.
Here is how he looks now, little smiling boy:

IMG_3191

Tuesday, 21 August 2012

Baby socks free knitting pattern. 3-6 months

IMG_2768

As so many people like my newborn socks and some of them asked me to make the bigger size pattern too I finaly did it. I used double knit yarn, but it was actually quite fine for double knit (it allways surprises me how yarn can vary in DK range).
The pattern is similar to the newborn sock pattern, only the rib part folds in half when the sock is done, so it is made to be much longer than it was in newborn socks. Of couse, you can make the rib small, then you need to make 5, or 7, or 10 (definetly not less than 5) rows of rib in the beginning instead of 15.

So again you will need a bit of yarn and 2.5mm double pointed needles.

Cast on 28 stiches and divide them between 4 needles. There will be 7 st on each needle then. We'll work in rounds starting with the 1x1 rib.
Round 1: *k1, p1*, repeat 9 more times from * to *.
Rounds 2 - 15: repeat round 1
Round 16: knit
Round 17 - 25: repeat row 16
then work only on first and second needles, which means - with 14 st. Take them to one needle and work in rows.
Row 26: knit
Row 27: purl
Row 28 - 31: repeat row 16-17 two more times.
Row 32: knit 9, k2tog, turn
Row 33: take the first st off to the working needle (don't purl it!), purl 4, p2tog, turn
Row 34: take the first st off to the working needle (don't knit it!), knit 4, k2tog, turn
Row 35: take the first st off to the working needle (don't purl it!), purl 4, p2tog, turn
Row 36: take the first st off to the working needle (don't knit it!), knit 4, k2tog, turn
Row 37: take the first st off to the working needle (don't purl it!), purl 4, p2tog, turn
Row 38: take the first st off to the working needle (don't knit it!), knit 4, k2tog, turn
Row 39: take the first st off to the working needle (don't purl it!), purl 4, p2tog, turn

And you'we done the heel!
Knit that 6 st from the top of the heel, then cast on 4st along the side of the heel, knit the stiches from 3rd and 4th needle, cast on 4 st along the other side of the feel. Now you should divide stiches as following: 7 st on the 1st needle (4 from the side of the heel and 3 from top of the heel), 7 st on the second (the same as on the first one), 7 st on the 3rd, 7 st on the 4th.
Knit 14 more rounds.
Then you need to start decreasing to form the toes. K2tog in the beginning and end of each needle in every second row twice, then knit every two st together. You will have 6 st left. Cut the yarn leaving 15cm long tail. Using the tapestry needle sew the last st together and hide the yarn ends.
Repeat for the second sock!

Saturday, 18 August 2012

Fabric balls!

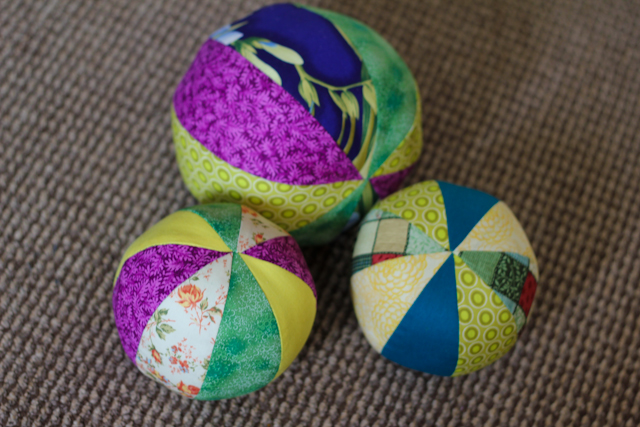
Just a quick little post to show you the fabric balls I made for The Little Man. He really likes them and we are practising some sort of football now :)

IMG_2617

The pattern and tutorial fore them are here: http://www.purlbee.com/fabric-beach-balls/ and if you heven't seen Purl Bee before prepare to waste some time browsing all of their tutorials and ideas, as they've got tons of them for sewing, knitting and crochet lovers!
And I will try to get some sleep and be organized for my shopping and packing tomorrow.

Thursday, 16 August 2012

The owl

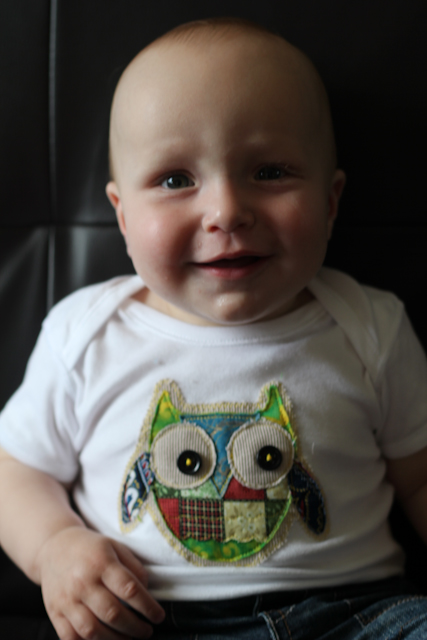
When I was making gifts before Fathers Day I bought three plain vests for our Little Man and made the "SON" aplique on one of them. As I thought it looks fun I had an idea of making some apliques on two other ones. So I searched the Internet and found an Owl aplique pattern which I liked immediatelly. It was a bit too big for a 6-9 months vest, so I printed it out on 70% (not 100%) and made one for the Little Man.

IMG_2612

Looks like he likes it :) It was easy to make and fun to look at so I would really recomend it :)

Tuesday, 14 August 2012

Knitted baby cardigans. Free patterns found online.

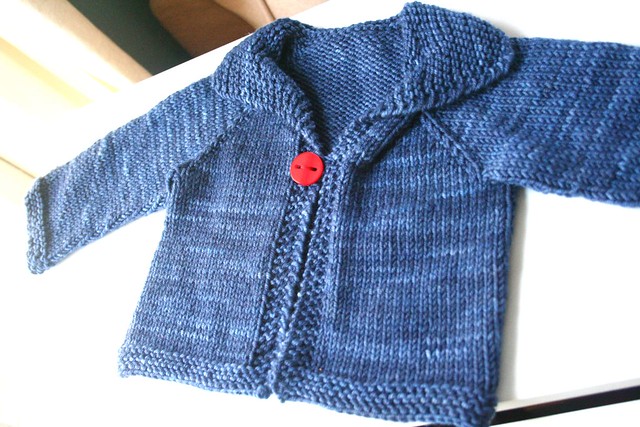
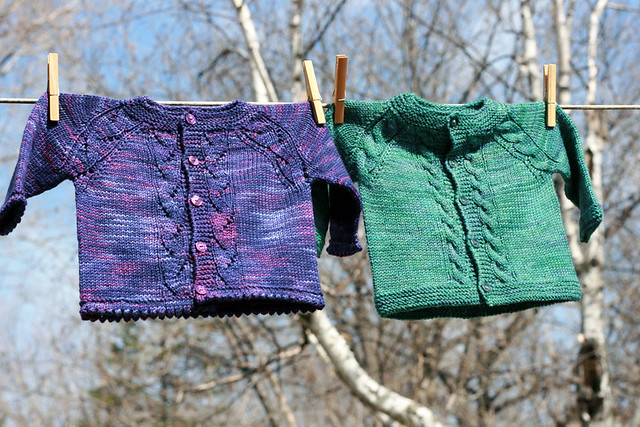
Ok, so I was searching the Web again. This time I had a reason - just found out, that my good old school friend became a Dad and he and his fiance had a lovely boy. Well, of course I needed to knit something for that little man! But all the patterns I had were for bigger babies (ok, it's not true, I had a few for newborns, but they just didn't inspire me). So I went online and spend some time searching. And some of the patterns look so nice, that I just have to share them with you!

1. Concentric stripes cardigan for 0-3 months made by Inner Child Crochet


2. Garter yoke baby cardigan for approximately 6-12 months made by Jennifer. She also suggests to use fine yarn for smaller size.

3. Easy baby cardigan by Diane Soucy. Size is newborn and it really looks easy. Fast, fun, super-cute pattern, as it's said on Ravelry.


 4. Little garter cardi by by Ragga Eiriksdottir foind on Knitting Iceland. Sizes: 3-6 mo (9-12 mo) 2-3 y. Great, isn't it? It is a seamless cardi, so might be a bit tricky to make but looks like it's worth it.

5. Sunnyside baby sweater from Tanis Fiber Arts. It looks gorgeous and has a variety of sizes avalable: 3-6 (6-12, 12-18, 18-24) months.


6. Plain cardigan by Pickles from Norway. Size 0-3 months is free, bigger sizes are available in their shop. And they have a lot of other cool free patterns too, like Cool Kid Hooded Hat or The Oslo Anorak


7. Grow-along cardigan. This is for bigger babies, from 6-8 months to 1 1/2 years, but it is so beautiful, that I couldn't resist.

They are just lovely! All of them. So now I only need to decide which one I will make

Saturday, 14 July 2012

Every baby needs a teddy

Probably all the babies have their own teddy bears. And not only babies. I was collecting teddy bears myself a couple of years ago. My Little Man has his own teddy too. Actually this is the first toy he had, as it was given to me by my sister when she came to our wedding and brought that teddy all the way down from Denmark. Little Man was still inside me and had just passed his 20 week scan. after his birth my sister came to see him and started playing with him showing him the teddy bear and after she left I continued to do that - showing him the teddy and telling stories about his. So soom Little Man understood that teddy is his friend and he bacame a favourite toy.

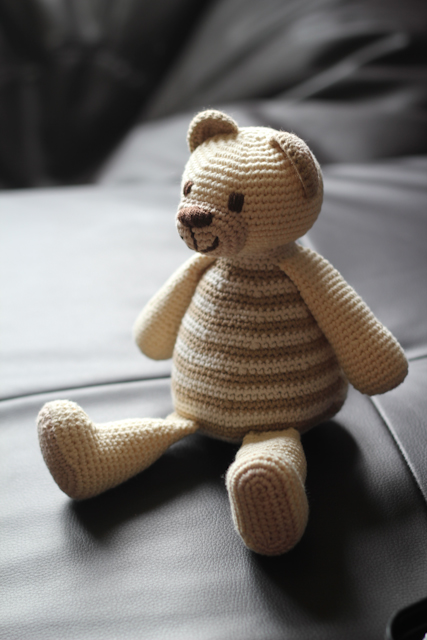
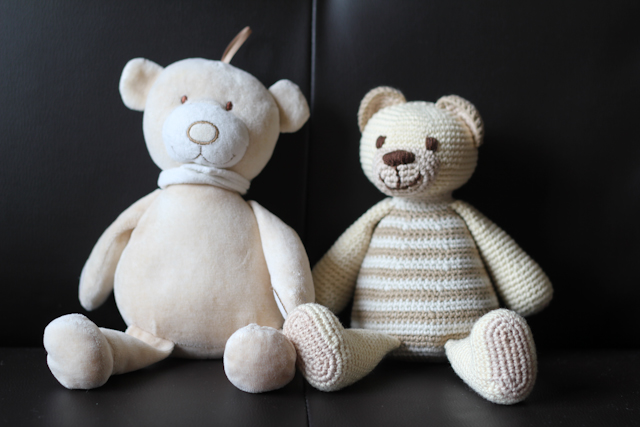
That is why I decided that my little nephew needs to have his own teddy too. Little Man's teddy bear was my inspiration, but the teddy I made was crocheted from lovely soft cotton. This is another June project. Took me three days to make and a month to post about it.

IMG_2519

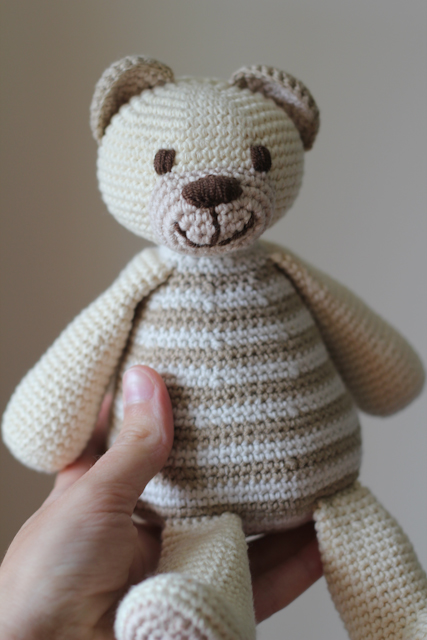
Here he is sitting on my sofa right before I gave it to little baby Leon. He is not too small - just the right size for a baby's little hands. Compare him with my hand on the next picture :)

IMG_2523

And here is the teddy and his prototype - our beloved Danish teddy bear.

IMG_2520

My husband said this teddy looks like a little bee. So may be I'll make the next one with a body of black and yellow stripes so he really would look like a bee. A bee bear. Sounds good :)

Saturday, 26 May 2012

Mike the Monkey - my big crochet project

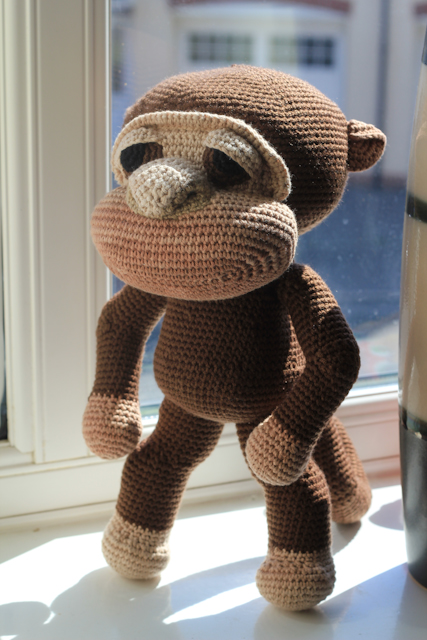
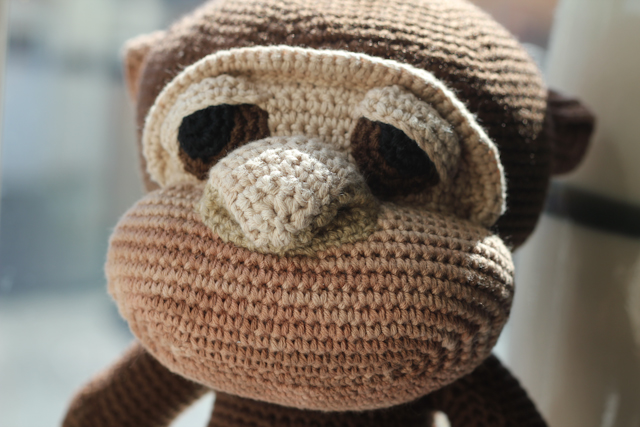
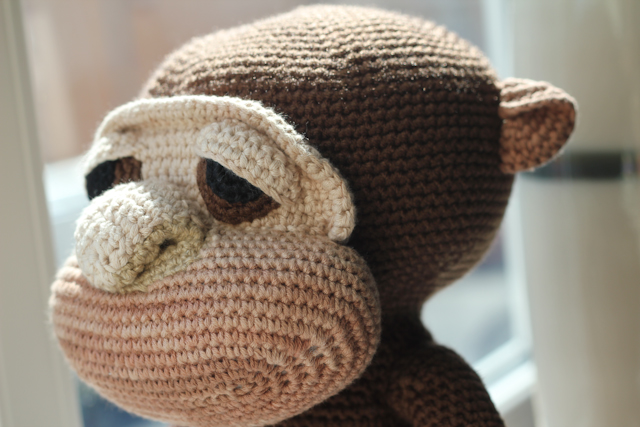
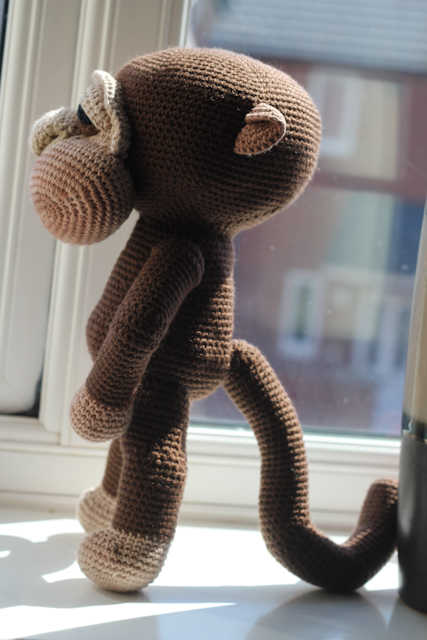
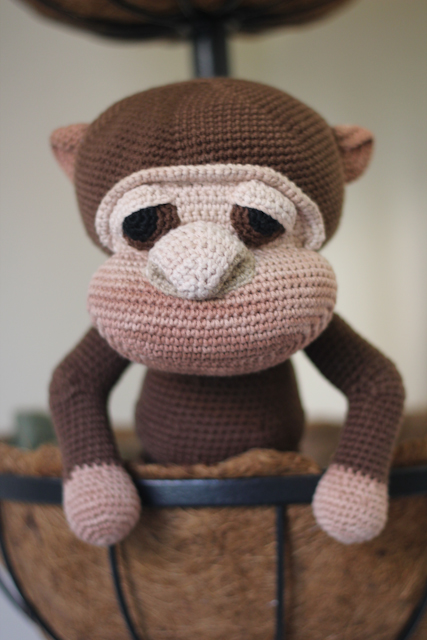
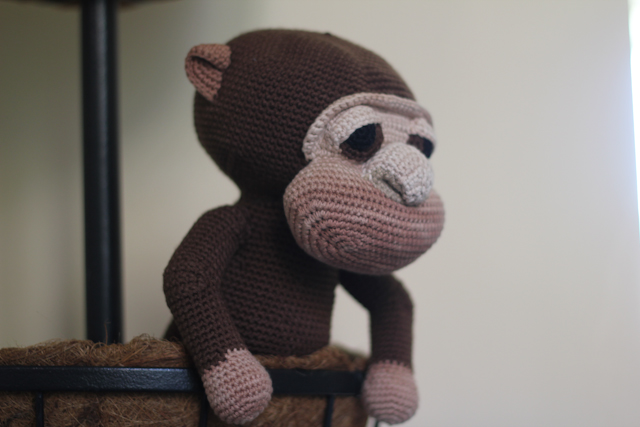
A while ago I mentioned a big project I made this month and now it's time to show it, so I'm proudly presenting you all MIKE THE MONKEY!

IMG_2246

IMG_2245

This crocheted monkey was an order. I was asked to make a monkey for a little boy aged 1,5 who has been on a safari and liked the monkeys more than anything else.
I never made monkeys before so it was quite a challenge for me. I've spent acouple of days just trying to figure out how a monkey should look like and then it took me about a week to crochet (I've changed the arms 3 times, and the legs 2 times) and I can say that in the end I'm kind of proud of myself.

IMG_2247

IMG_2248

IMG_2249

IMG_2250

IMG_2251

IMG_2252

The design and crocheting is 100% my, the yarn is cotton & acrilic, no little bits, no beads or buttons, so it's complitely safe for the babies under 3.
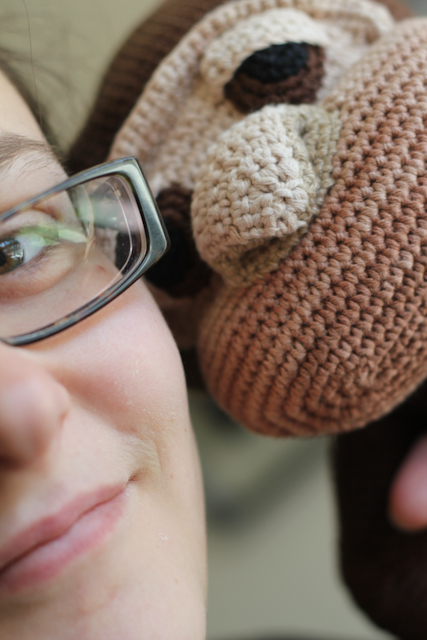
And here I'm with the monkey, so you can see how big it actually is.

IMG_2253

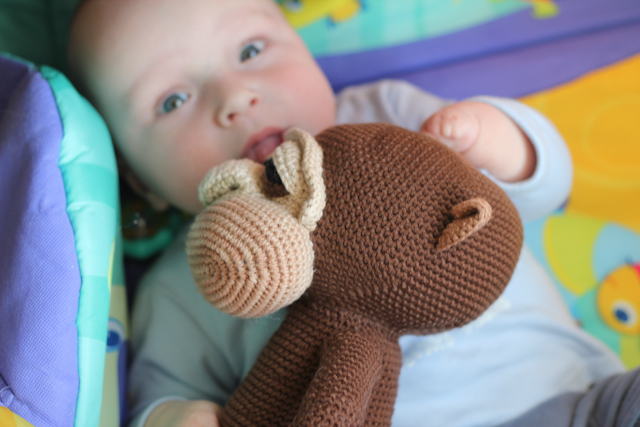
And here is the monkey and My Little Man. His firs reaction was amazing - give it to me, mummy, give it! Well, I didn't let him to chew and soak it, so I had to mamage to make a quick photo and take the monkey away.

IMG_2259

And I'm glad and proud of myself (again!) because the little one I was making it for really enjoyed it!

Now I should make a pattern for it, as my friend in the wool shop aslo fell in love with the monkey and immediatly asked me if I've written it all down. Shure I did! So the pattern will be available in a while at Knitters World Scarborough.

Wednesday, 23 May 2012

My little Man's half-birthday

It is unbelievable, but yesturday My Little Man had his half-birthday! Yes, he is 6 months old now! And to me it still feels like he was born just a couple of weeks ago. but in the same time it feels like he's been with me all my life and all the years before him seem like an old movie about someone else, someone i used to know, but now barely can remember...
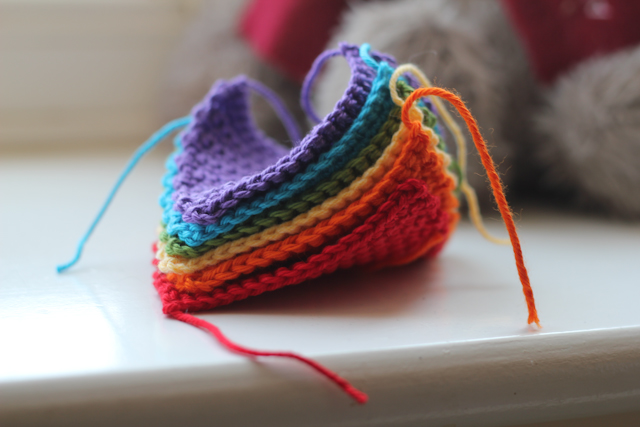
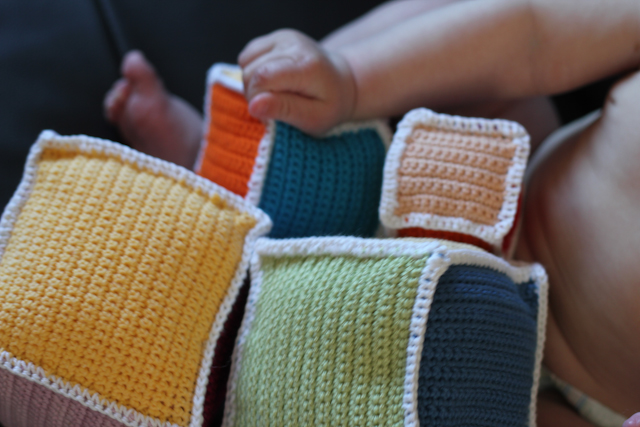
Anyway, yesturday we spent a lovely time out, sitting on the grass, watching duck families and ladybugs. Little Man had no cake as he is too young for it, but he had some giftshe seems to enjoy. We bought him a highchair so now he can join us while we have our dinner. And I also made a crochet garland with his name on for his room (photos will follow a bit later) and some soft crochet cubes for him to play with. I started a couple of days before, as it is not as quick to crochet all 6 sides for each cube and then join them together. Here are some colourfull pics of the process:

IMG_2320

Love the light an this picture, but it doesn't show how really bright the colours are. This one is more precise:
IMG_2316

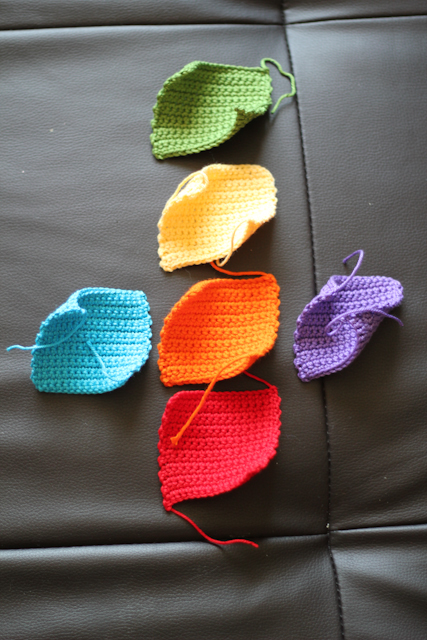
Then I had to decide in what order to put them before joining it all into a cube:

IMG_2321

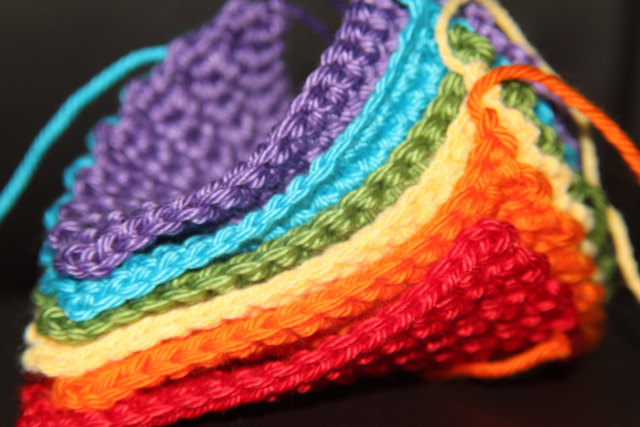
And they all looked so bright and fun that I could not resist and made a couple more pictures:

IMG_2324

IMG_2325

The last one is my favourite.

And then, finaly, when it was all finished and presented to My Little Man I definetly could say he likes them all!

IMG_2328

Well, I know he looks serious on this picture, but all the funny faces were blured as he was moving and trying to eat his gifts all the way long while I was playing a photographer. But he still is gorgeous, isn't he?

IMG_2330

Tuesday, 22 May 2012

Baby sleeveless jacket free pattern. Size 0-3 months.

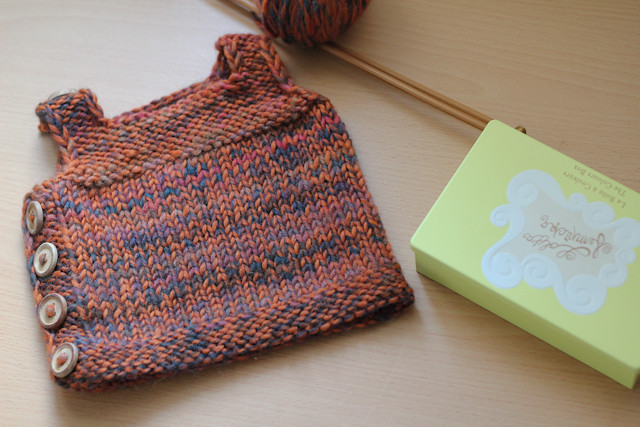
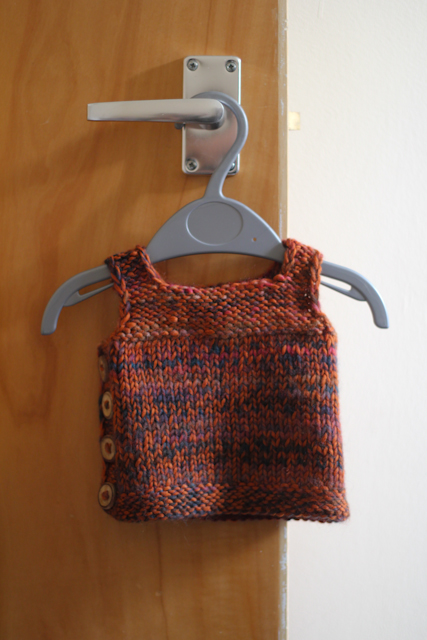
I know, it's getting worm out there, but still some little babies might need a sleeveless jacket for more windy days. Plus the weather in England is changing every day and you never know what it;s gonna be like tomorrow. So here I made a little sleeveless jacket for a 0-3 months old baby and decided to share a pattern for those who want to make one for their babies.

IMG_2064

IMG_2067

IMG_2072

I used some aran weight yarn from my stash, a bit more than 50 grams. I think it was Filati, some wool and acrilic mix, but I'm really not shure. Anyway, you will need a bit more than 50g of aran veight yarn, 5mm needles, 5 buttons and a tapestry needle to complete this project. It is supereasy!

IMG_2074

Gauge 10 st x 10 rows = 6 x 4,5 cm. My friend from the wool shop measured the finished project and said the tension should be 15sts/21 rows in st st.

In the beginning and till the armholes body front and back are knitted as one pease. Cast on 65 st.
1 row: purl
2 row: knit
3 row: purl 61 st, p2tog, yarn over, purl 2
4 row: knit
5 row: purl 3, knit 26, purl 5, knit 26, purl 5
6 row: knit 5, purl 26, knit 5, purl 26, knit 3
7 - 10 row: repeat rows 5 and 6 two times
11 row: purl 3, knit 26, purl 5, knit 26, purl 1, p2tog, yarn over, purl 2
12 row: knit 5, purl 26, knit 5, purl 26, knit 3
13 row: purl 3, knit 26, purl 5, knit 26, purl 5
14 - 17 row: repeat rows 12 and 13 two times
18 row: knit 2, yarn over, k2tog, knit 1, purl 26, knit 5, purl 26, knit 3
19 row: purl 3, knit 26, purl 5, knit 26, purl 5
20 row: knit 5, purl 26, knit 5, purl 26, knit 3
21 - 24 row: repeat row 19 and 20 two times
25 row: purl 3, knit 26, purl 5, knit 26, purl 1, p2tog, yarn over, purl 2
26 row: knit 5, purl 26, knit 5, purl 26, knit 3
27 row: purl 3, knit 26, purl 5, knit 26, purl 5
28 row: cast off first 5 st, purl 25, cast off 5, purl 25, knit 3
29 row: cast off 3, p2tog, purl 20, p2tog, purl 1, turn
leave the rest of the stiches as they are for now. We'll return to them later. Now we will continue working on the back of our sleeveless jacket
30 row: knit
31 row: p2tog, purl 20, p2tog
32 row: knit
33 row: purl
34 row: knit
35 row: purl
36 row: knit
37 row: purl
38 row: knit 6, cast off 10, knit 5,
39 row: purl 6
40 row: knit 6
41 row: purl 6
42 row: knit 6
43 row: purl 6
cast off 6 and cut the yarn. Now work with the 6 st on the other side of the back, rejoin the yarn and repeat rows 39 - 43. Cast off. And you're done with the back.
For the front:
return to the stiches left on the needles, Rejoin the yarn then
purl 1, p2tog, purl 20, p2tog, purl 1
then repeat rows 30 - 35:
36 row: knit 6, cast off 10, knit 5,
37 row: purl 6
38 row: knit 6
39 row: purl 6
40 row: knit 6
41 row: purl 6
42 row: knit 6
43 row: purl 6
Cast off. Now work with the 6 st on the other side of the front, rejoin the yarn:
37 row: purl 6
38 row: knit 6
39 row: purl 6
40 row: knit 6
41 row: purl 6
42 row: knit 6
43 row: purl 6
44 row: knit 6
45 row: purl 1, p2tog, yo, purl 3
46 row: knit
47 row: purl
cast off. And you've done the front!

Now hide all the yarn ends, sew the left shoulder stripes together, sew the buttons according to your buttonholes (every time we made yo it was actually a buttonhole), steam press and try it on your young man! Or a young lady. :)

Sunday, 20 May 2012

So many things going on

Omg, so many things happened in the last month! I've been really busy with some of my new projects and My Little Man who decided to totally chande his sleeping routine twice this month so when I had some time that could be a moment for my blog I just felt far too tired to write something.
But now it feels like I just should write something, should share all the things I've done.

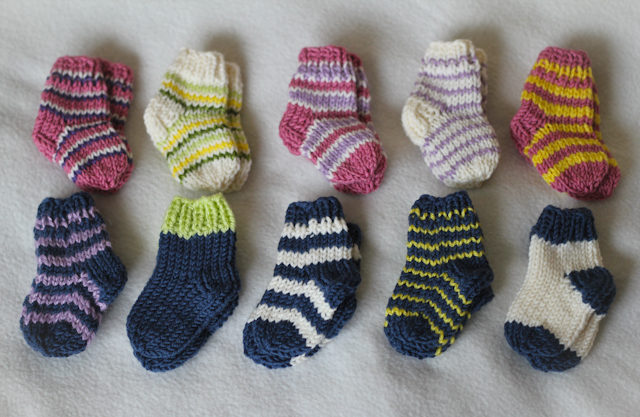
First of all, after I made little socks for my nephew a few people just totally fell in love with them and I was offered to make some for sale in a local wool shop. Of course I felt excited! So I picked up some pure merino wool, used a bit of yarn scraps from my own stash and made 10 (!!!) pairs of baby socks. Here they are, my little lovelies:

IMG_2176

Now we are thinking of presentation boxes and lables and after a while this little socks will be sold in Knitters World Scarborough as Baby First Socks in a nice gift boxes. And everyone can order some really special ones from me, just let me know in comments.

The next thing this month was the gifts for two ladies in our knitting club, who expect their babies in August and September. I made a little sleeveless jacket, hat and socks for one, and a cotton jacket for another one. You will see the similar sleeveless jacket in the next post where I will share a free pattern of it and I still need to make a picture of the cotton jacket, but it definetly will be done and I will tell you it's special story.
But I can show you the little hat and socks:

IMG_2172

Then I made two little toys as an example for the owner of our wool shop as he has an idea of making crochet workshop, where we could teach people to crochet toys using my patterns. I will not show you the toys I made, I used really odd scraps of wool for them, because I just needed to show the form of the toy and yarn didn't matter, it just had to be double knitt. I will make some normal samples and show them here a bit later.

And the biggest project I had this month was a crocheted monkey that will have a separate post about it as it took me the whole week to figure out how to make it and to crochet it all.

That is how it goes and it's really exciting and interesting. I just wish I had more time for sleeping :)

Saturday, 21 April 2012

Newborn knitted socks free pattern

Newborn cocks

As my little nephew is freezing in Manchester (it's only +16 in their appartment, and even less during the night) I just thaught it would be right to make him some little socks. So, I'm not only making them, but sharing a free pattern with you too!

Newborn sock set

Ok, let's start.
First of all, we'll need some DK yarn leftowers. I really mean some scraps, because for such a tiny project you don't need much of yarn. So it's ideal for using some bits from your bigger projects.
Then we'll need a set of 2.5mm double pinted needles.

My gauge was: 10st x 10 rows = 4.5 x 3 cm.

Cast on 20 stiches and divide them between 4 needles. There will be 5 st on each needle then. We'll work in rounds starting with the 1x1 rib.
Round 1: *k1, p1*, repeat 9 more times from * to *.
Rounds 2 - 5: repeat round 1
Round 6: knit
Round 7 - 12: repeat row 6
then work only on first and second needles, which means - with 10 st. Take them to one needle and work in rows.
Row 13: knit
Row 14: purl
Row 15 - 18: repeat row 13-14 two more times.
Row 19: knit 6, k2tog, turn
Row 20: take the first st off to the working needle (don't purl it!), purl 2, p2tog, turn
Row 21: take the first st off to the working needle (don't knit it!), knit 2, k2tog, turn
Row 22: take the first st off to the working needle (don't purl it!), purl 2, p2tog, turn
Row 23: take the first st off to the working needle (don't knit it!), knit 2, k2tog, turn
Row 24: take the first st off to the working needle (don't purl it!), purl 2, p2tog, turn
And you'we done the heel!
Knit that 4 st from the top of the heel, then cast on 4st along the side of the heel, knit the stiches from 3rd and 4th needle, cast on 4 st along the other side of the heel. Now you should divide stiches as following: 6 st on the 1st needle (4 from the side of the heel and 2 from top of the heel), 6 st on the second (the same as on the first one), 5 st on the 3rd, 5 st on the 4th. After dividing the sts on the needles and knitting the last two sts on the first needle your yarn will be between the first and the second needle. Start knitting from the second needle:
Knit 4, k2tog on the 2nd needle, knit all the sts from the 3rd and 4th needles.
In the next round k2tog in the beginning of the first needle and knit all the sts from 2nd, 3rd and 4th needle. So you get 5 st on each needle.
Knit 11 more rounds.
Then you need to start decreasing to form the toes. K2tog in the beginning and the end of each needle. You will get 3st on each needle after making this row. Knit the next row with no decreases.
In the next row knit together every 2 st. You will have 6 st left after making this row. Cut the yarn leaving 15cm long tail. Using the tapestry needle sew the last sts together and hide the yarn ends.
Repeat for the second sock!
 
Newborn stripy socks

This is a quick and fun project to make! Give it a try and in an evening you could make a couple of pairs for those little feet of your baby (nephew, grandchild, some friend's baby). It is so addictive that after the first pair it is really difficult to stop and you might find yourself choosing the colours for the next pair when the first pair is not even finished.
Any comments about the pattern would be highly appreciated as this is my first sock pattern and I'm not English native speaker. But I still hope it's clear enough and you all could have a lot of fun with it :)
And if you make a pair I really would love to see the pictures of your little socks too!