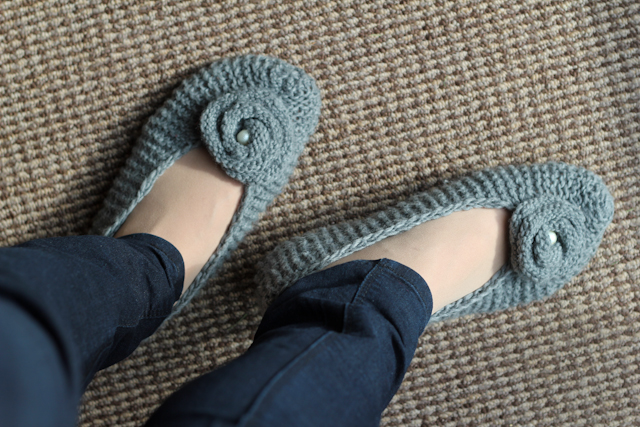
What I really mean is not slippers FOR one evening, it's slippers MADE IN one evening. :)
As it looks like the weather is changing into it's usuall cloudy and rainy type again, and because I've got a huge hole in my old slippers I just had to make another ones. While knitting I really wanted not only to make some nice slippers for myself, but to create a super easy pattern that even a beginner could follow. Hope I really did it :) Try it and let me know!
This slippers are size 7, but they are quite stretchy, so I would say it's 5 - 8.
The yarn was just something from my stash, but it's DK and it didn't take too much yarn to make the slippers. Less than 100g definetly. And you will need 5mm needles, a tapestry needle and a spare evening.
So, let's start?
Tension: 10st x 10 rows = 5,4 cm x 3,3 cm
Slipper body:
Cast on 33 st, knit 50 rows, put stich markers on the both ends of the 50th row, knit 4 more rows,
the next row: k2tog, knit 7, k2tog, k2tog, knit 7, k2tog, k2tog, knit 7, k2tog
knit 4 rows with no decreases
the next row: k2tog, knit 5, k2tog, k2tog, knit 5, k2tog, k2tog, knit 5, k2tog
knit 4 rows with no decreases
the next row: k2tog, knit 3, k2tog, k2tog, knit 3, k2tog, k2tog, knit 3, k2tog
knit 4 rows with no decreases
the next row: k2tog, knit 1, k2tog, k2tog, knit 1, k2tog, k2tog, knit 1, k2tog
knit 4 rows with no decreases
cut the yarn, leaving a long end (we'll need it to sew the slipper), bring the yarn through the remaining 9 stiches, pull up firmly. Then fold the slipper in half and sew it from the toes to the stich markers on row 50. Sew slipper back seam.
For the flower:
cast on 90,
Row 1: purl 90,
Row 2: knit decreasing each 10th st,
Row 3: purl 81,
Row 4: knit decreasing each 9th st
Row 5: purl 72
Row 6: knit decreasing each 8th st
cut the yarn, leaving a long end, bring the yarn through the remaining stiches, pull up firmly. Start rolling up the flower in a spiral shape, starting with the center. When you've shaped the flower sew it to the front part of the slipper. Add a bead in the center of your flower to make it more glam and shiny.
cut the yarn, leaving a long end, bring the yarn through the remaining stiches, pull up firmly. Start rolling up the flower in a spiral shape, starting with the center. When you've shaped the flower sew it to the front part of the slipper. Add a bead in the center of your flower to make it more glam and shiny.
Repeat for the second slipper and enjoy your new pair.


No comments:
Post a Comment